

Honey Pie

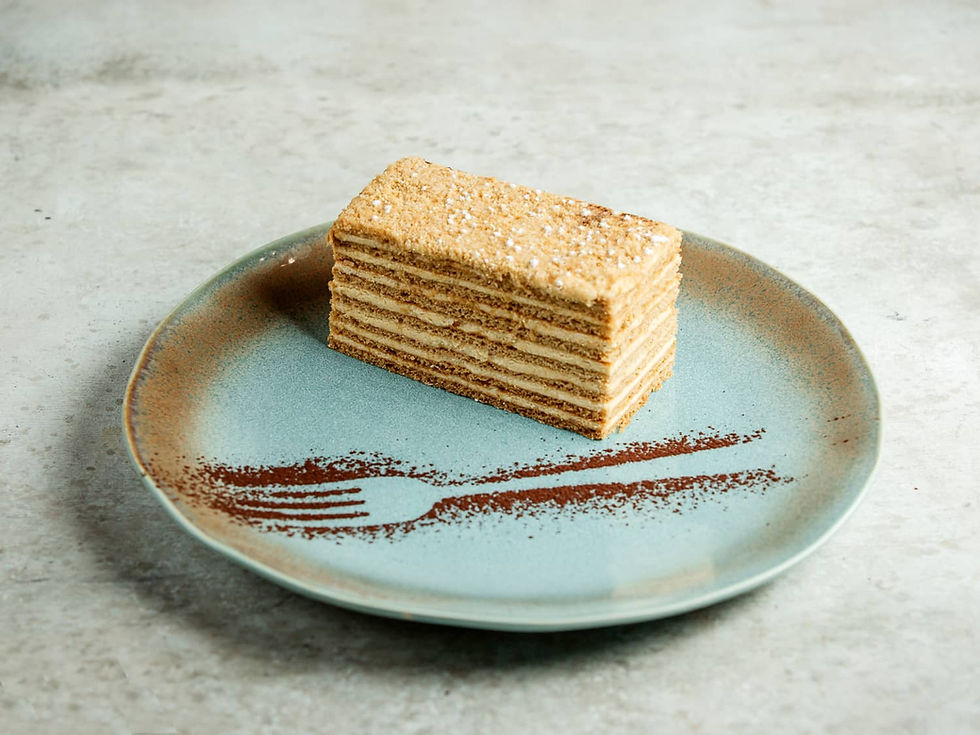
This exquisite honey pie, known as "medena pita" in Serbian, originates from the rich culinary traditions of Serbia, a country renowned for its diverse and flavorful dishes. The honey pie is a true testament to the sweetness of Serbian desserts, combining the natural sweetness of honey with a delightful crust that is both tender and flaky. The flavor profile of this pie is nothing short of enchanting; the honey infuses the filling with a warm, golden essence that evokes feelings of comfort and nostalgia. Each bite offers a perfect balance of sweetness and texture, making it a favorite among those who appreciate homemade desserts.
Ingredients and Preparation
Making this delightful honey pie is not as daunting as it may seem. Although it requires some attention to detail, the process is straightforward and can be accomplished with a little determination and love for baking. To create this delicious treat, you will need a few simple ingredients that are often staples in many kitchens.
These typically include-
Flour: The foundation of the crust, providing structure and a base for the pie.
Honey: The star ingredient that adds natural sweetness and flavor.
Eggs: These help bind the ingredients together and contribute to the texture.
Butter: For richness and a flaky crust, butter is essential.
Baking soda This helps the crust rise and become light and airy.
Milk or yogurt To add moisture and enhance the flavor.
Once you have gathered your ingredients, the process begins with preparing the crust. It involves mixing the dry ingredients with the butter until they resemble coarse crumbs, followed by the addition of eggs and milk to form a dough. After chilling the dough, it is rolled out and placed in a pie dish. Next, the filling is prepared by combining honey with additional eggs and sometimes a hint of vanilla or lemon zest for extra flavor. This mixture is poured into the prepared crust, and the pie is baked until it is golden brown and set.
Enjoying Your Honey Pie
Once your honey pie is out of the oven and cooled slightly, it is ready to be served. The aroma that fills your kitchen during baking is simply irresistible, and the first slice reveals a beautifully baked pie that is both inviting and appetizing.
This honey pie can be enjoyed on its own, or it can be paired with a dollop of whipped cream or a scoop of vanilla ice cream for an added touch of indulgence. It is perfect for special occasions, family gatherings, or simply as a delightful treat to enjoy with a cup of tea or coffee. In conclusion, this Serbian honey pie is not just a dessert; it is a delightful experience that brings people together with its rich flavors and comforting texture.
With just a little willpower and the willingness to follow the recipe, you can create a delicious masterpiece that will surely impress your family and friends. So roll up your sleeves, gather your ingredients, and embark on this sweet culinary adventure!
Ingredients: medium, total time: 80 min.
Dough:
1 egg
150 g of sugar
1 teaspoon baking soda
50 g margarine
2 Tablespoons milk
2 Tablespoons honey
450 g of smooth flour
1 Tablespoon cocoa
Cream:
400 ml of milk
2. 5 Tbsp plain flour
2 Tbsp granulated sugar
1 bag vanilla sugar/ 10 g
2 Tbsp powdered sugar (not overfilled)
150 g of margarine
Chocolate glaze:
100 g of cooking chocolate
3 Tablespoons oil

Preparation:
Dough:
Combine all ingredients except for the flour using a mixer in a bowl that is suitable for baking, as the dough needs to be heated initially.
Heat on low and stir continuously until the baking soda begins to foam. Remove from heat and incorporate the flour.
Prepare a smooth dough, which is sticky due to the honey, making it easy to roll out into sheets the size of an oven tray.
Divide the dough into four equal portions and immediately roll out the sheets, as it is much easier to do so while the dough is warm rather than when it cools.
I work with four sheets, but I recommend starting with three for your first attempt, as it will be easier to roll them into slightly thicker sheets. My sheets are very thin.
Each sheet is rolled out to the size of an oven tray, rolled onto a rolling pin, and transferred to an inverted, floured baking sheet.
This process is straightforward as the dough doesn’t crack. However, if you are concerned, you can confidently roll it out on baking paper and transfer it with the paper.
Once the sheet is on the baking tray, trim the edges and remove any excess dough.
Bake the sheets at 180°C for approximately 5-8 minutes. Remove them once the edges begin to set.
Carefully slide a bread knife under the sheet to separate it from the tray and gently place it onto a cloth.
Cream
Prepare the cream by cooking 2 and 1/2 spoons of heaped flour, 2 spoons of sugar, and vanilla sugar in milk, similar to making pudding.
Once cooled, incorporate margarine combined with powdered sugar into the mixture and blend thoroughly until a smooth cream is achieved.
Divide the cream into three equal portions and spread over the crusts.
Apply the chocolate glaze on the final layer.
Glaze:
I consistently melt the chocolate using a double boiler, thoroughly combine it with oil, and then pour it over the cake.
The crusts become firm when coated with cream, so they should be pressed gently to prevent breaking. After a few hours, they soften and can be sliced effortlessly, providing a melt-in-your-mouth experience.
The crusts should be coated on the same day.
Enjoy in bites!
"A recipe may begin with ingredients, but its true flavor comes from the love and memories shared through it." ☕🍰🌹
NOTE:
Keep the cake covered in the refrigerator for up to 5 days.
Do you want to try something a little different?


Use the contact form for questions or advice.
I would be happy if you would comment on my recipes and put like.


Comments