

Russian Souffle Cake

Updated: 3 days ago
A Delightful Russian Cake Experience
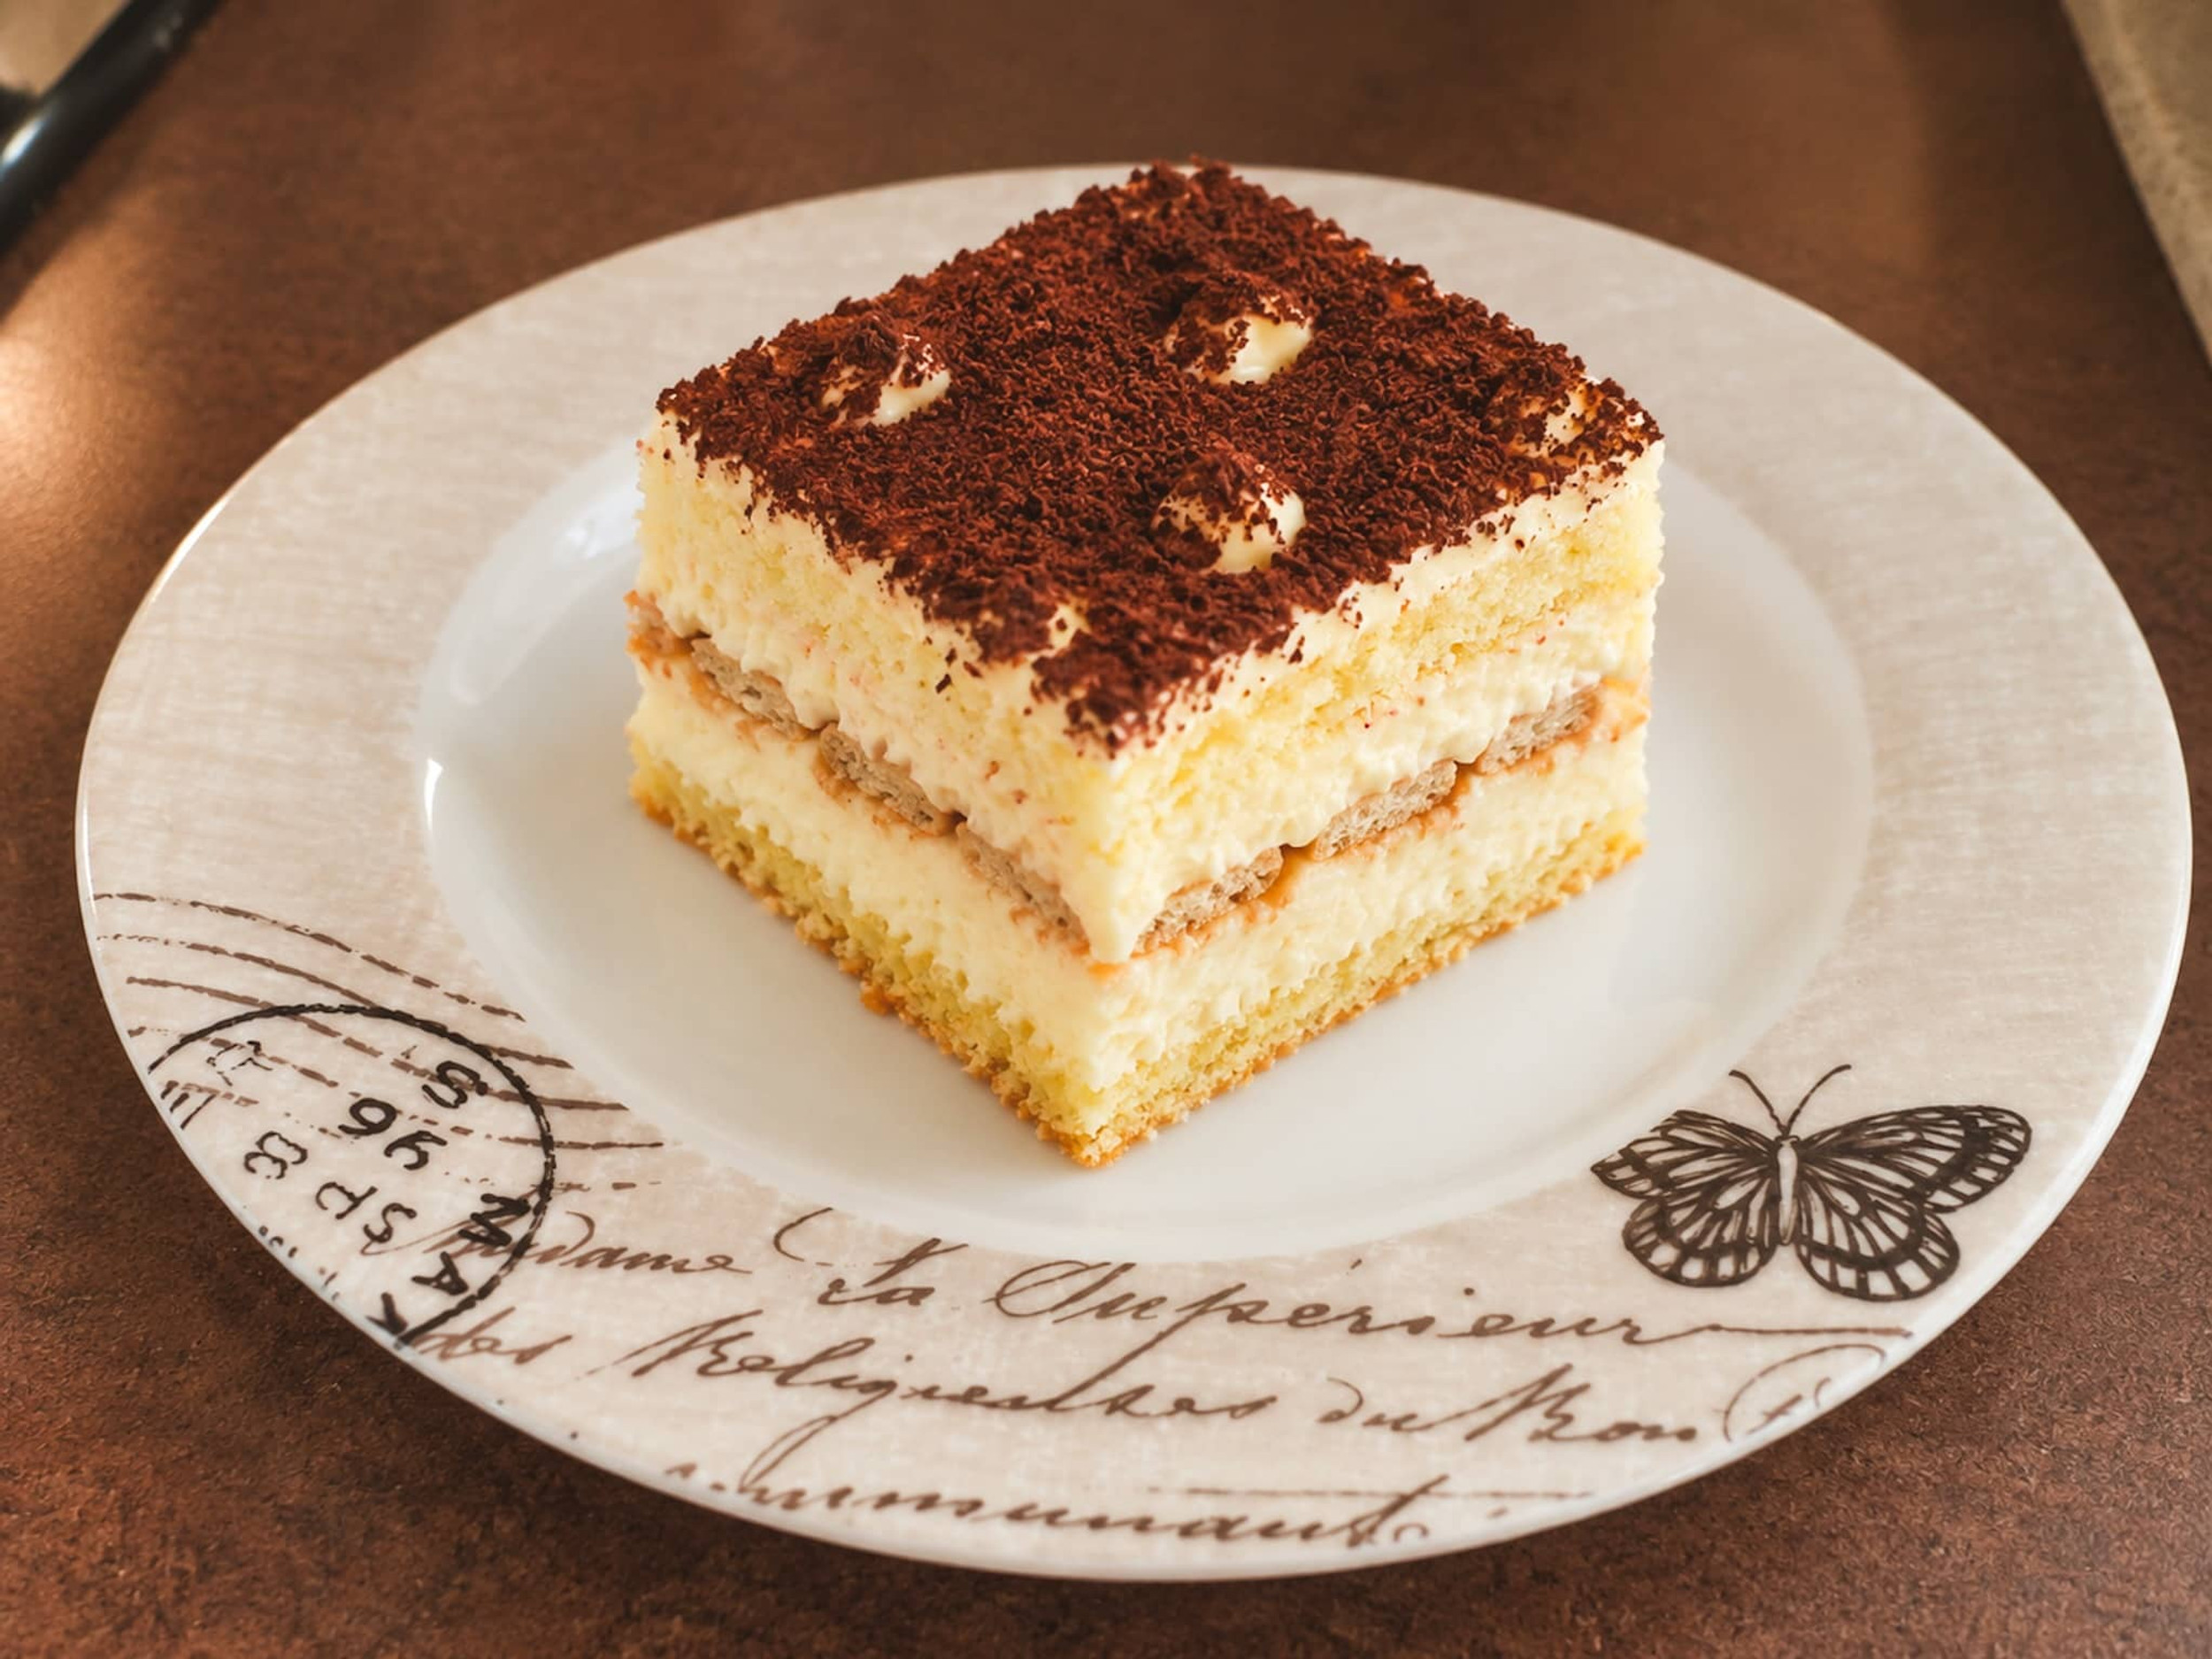
A delightful, soft, and sparkling cake featuring layers of luscious vanilla cream and a rich chocolate topping, this exquisite Russian cake has captivated audiences worldwide with its unique flavor profile and elegant presentation. The cake is not only a treat for the taste buds but also a feast for the eyes, making it an ideal centerpiece for various celebrations such as birthdays, weddings, or festive gatherings.
The preparation of this cake is relatively simple, which adds to its appeal. Even novice bakers can successfully create this dessert with a bit of patience and attention to detail. The process begins with crafting the base of the cake, which is light and airy, allowing it to soak up the flavors of the vanilla cream beautifully. The vanilla cream itself is made from high-quality ingredients, ensuring a smooth and creamy texture that complements the cake perfectly.
One of the key aspects to consider when making this cake is the resting period, which is crucial for achieving the best flavor and texture. After assembling the layers, the cake requires resting for a period of 2 to 6 hours. This time allows the flavors to meld together, enhancing the overall taste experience. For those who may have a busy schedule, this resting period offers flexibility, as you may choose to continue the preparation the following day. This makes it even more convenient for bakers who want to plan without sacrificing quality.
To achieve the best results, it is highly recommended to follow the recipe meticulously. Each step, from mixing the ingredients to layering the cake, plays a vital role in the outcome. Pay special attention to the chocolate topping, which should be smooth and glossy, adding not only flavor but also a stunning visual appeal. A sprinkle of decorative elements, such as chocolate shavings or fresh berries, can elevate the presentation even further, making it a truly impressive dessert.
Conclusion
In conclusion, this Russian cake is a delightful creation that combines simplicity with elegance. Its soft texture, combined with the creamy vanilla and decadent chocolate, creates a harmonious balance that is sure to please anyone who takes a bite. Whether you are preparing it for a special occasion or simply to indulge in a sweet treat, this cake is sure to leave a lasting impression on all who enjoy it.
Ingredients: round mold 27-28 cm in diameter/ or rectangular 20x30 cm, very easy, total time: 1 hour, Standing cake 2-6 hours
Biscuit:
4 eggs
120 g sugar
130 g flour
pinch of salt
Cream:
I part
10 egg yolks
150 g sugar
30 g flour
250 ml milk
II part
10 egg whites
200 g sugar
200 g butter
25 g gelatin-put in a little water/ 200 ml
vanilla extract
Glaze:
50 ml whipping cream
100 g chocolate -50-60% cocoa
For sprinkling, you can use :
Coconut flour, almonds, walnuts grated, color flakes.

Preparation:
In this case, we will start with the cream first part.
Fill a medium pot with water and heat it over moderate heat until it reaches a boil.
Meanwhile, in a separate deep bowl, combine the egg yolks and sugar, whisking them into a frothy mixture. Then, incorporate the flour and stir thoroughly.
Once the water is boiling, place the bowl over the pot to cook the cream using steam.
After a few minutes, add the milk and continue cooking until the cream thickens.
Once the cream reaches the desired consistency, remove it from the steam, cover it with foil, and allow it to cool.
In the meantime, you will make a biscuit
In a large bowl, begin by placing the egg whites and a pinch of salt. Whisk with a mixer until the mixture becomes foamy.
Once the mixture thickens and becomes foamy, gradually incorporate the sugar, followed by adding the egg yolks one at a time.
After achieving a thick and compact consistency, gradually fold in the sifted flour using a spatula.
Once the ingredients are well combined and form a uniform mixture, prepare a 20x30 cm baking tray by lining it with baking paper.
Pour the mixture into the tray and use a cake knife to ensure it is evenly distributed.
Bake in a preheated oven at 180 °C for 25 minutes.
Processing:
After baking the biscuit, allow it to cool slightly before removing the baking paper and dividing the biscuit into two sections.
This will result in a rectangular shape for the biscuit.
Once the biscuit has cooled slightly after baking, remove the baking paper and cut the biscuit into two parts.
Consequently, you will achieve a rectangular shape for the biscuit.
Place the first section of the biscuit on a tray and encase it with a rectangular hoop.
This method will enhance the cake's shape and facilitate the pouring and setting of the cream.
We return to the cream of this cake, second part
In a large bowl, place the room-temperature butter and whisk it with a mixer until it becomes foamy.
Incorporate the vanilla extract and grated lemon peel, then whisk again.
Gradually add the cooled cream using a spoon, whisking with the mixer as you go.
Repeat this process several times.
Once the cream is smooth and compact, further refine it with a spatula.
Drain the gelatin of excess liquid and melt it, ensuring it does not boil.
Beat the egg whites with a mixer until foamy, then gradually add the sugar.
Once the mixture is thick, add the gelatin and mix again with a mixer until fully combined.
Gradually fold the beaten egg whites into the cream using a spoon, then thoroughly mix with a mixer until well integrated.
Once complete, take a tray with the biscuit base, pour the cream over it, and smooth it with a cake knife. Place the second biscuit layer on top and gently press it with your hands.
Refrigerate the cake for 2-6 hours to allow it to set.
Glaze:
Once the cake has set, carefully remove the rings surrounding it.
Prepare the glaze.
Add chocolate to the hot whipping cream and mix using a hand whisk until it reaches a suitable consistency for topping the cake.
Apply the icing with a cake knife, smoothing it out. You may also allow the icing to cascade down the sides.
Lightly sprinkle with coconut flour or any decorative toppings you have available at home.
Consider using grated walnuts, peeled almonds, or colored flake decorations, according to your preference.
Refrigerate the cake for approximately 1 hour to cool further, then serve.
Buon appetito!
"A recipe may begin with ingredients, but its true flavor comes from the love and memories shared through it." ☕🍰🌹
NOTE:
Keep the cake in the refrigerator for up to 5 days, covered.
Do you want to try something a little different?




#dessert #cake #sweet #Russian #souffle #homemade #recipe #delicious #easy #food #russian #soufle #cream #chocolate #simple #creamy #tasty #blog #foodblogger #coffeetimelena
Use the contact form for questions or advice.
I would be happy if you would comment on my recipes and give them a like.


Comments